With the two-way connection between IDEXX Neo and your IDEXX VetLab Station, you can order and receive in-house analyzer results in Neo. This integration is easy to use, saves time, helps you capture charges, and provides accurate diagnostic records.
You may have already completed the three steps that are common to all IDEXX diagnostic integrations:
- The tax rate and diagnostic markup are automatically applied to all IDEXX diagnostic tests (IDEXX In-house Analyzers and IDEXX Reference Laboratories) when they're downloaded.
- Go to Administration > Branch Settings to review these default settings before connecting to VetConnect PLUS. This can save having to edit each individual diagnostic test later.
All diagnostic orders and results are communicated through your IDEXX VetConnect PLUS account.
If you don't have an account, contact VetConnect PLUS customer support:
If you don't have an account, contact VetConnect PLUS customer support:
- Email support
- United States 1-888-433-9987, IDEXX VetConnect PLUS
- Canada 1-800-667-3411, IDEXX VetConnect PLUS
- Australia 1300 44 33 99, IDEXX VetConnect PLUS
- New Zealand 0800 838 522, IDEXX VetConnect PLUS
- Once you have your credentials, go to Administration > IDEXX Diagnostics.
- Under Account Credentials, enter your IDEXX VetConnect PLUS account information.
- Click Connect. A confirmation message appears in the message bar.
- To change your credentials, click the menu button
 and select Change Credentials.
Once you have connected VetConnect PLUS, the Directory of Services is automatically downloaded and it's time to manage reference data.
IDEXX uses standard terms to recognize your branch's species, breeds, and genders, so mapping is a critical step. Note that while mapping species and genders is required, mapping breeds is optional.
- On the menu, click your name. Then, click Administration.
- In the System Admin area, click IDEXX Diagnostics.
- Click the menu button and select Manage Reference Data.
- Click the tab to map (Species, Breeds, Sex).
- Click Show [number] unmapped to view only the unmapped items.
- The list on the left shows your practice’s values. In the corresponding field on the right, search for and select the corresponding IDEXX value. Your changes are saved automatically.
Tip: Use the Search species or breeds box on the Breeds tab to quickly find specific breeds.
Note: If you add additional species later, you will need to return to this page and map the new species to standard IDEXX terms. It can take up to 24 hours for this data to be available.
Complete the IDEXX VetLab Station-specific setup steps:
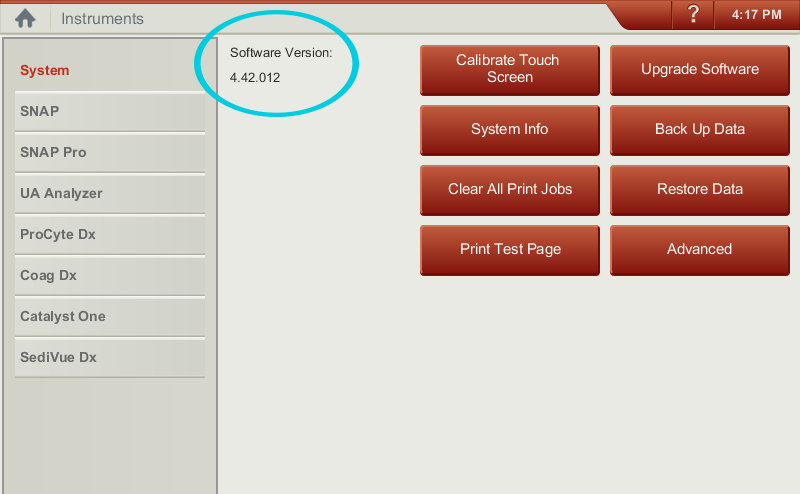
⚑ Step 4. Set up your IDEXX VetLab Station- You must be on v4.37 or greater on your IDEXX VetLab Station. To check the version, on the IVLS Home screen, tap Instruments. Your software version is displayed in the top-left corner. If you need help upgrading, contact IDEXX VetLab Station customer support: 1-800-248-2483, Option 8.
- You must activate IDEXX SmartService for your IDEXX VetLab Station(s) to provide constant connectivity. An indicator
 on the IVLS Home screen provides connectivity information via red and green lights. For more information see the IDEXX VetLab Station Operator's Guide: Customizing the Settings > IDEXX Smart Service Settings.
- You must activate IDEXX VetConnect PLUS on your IVLS. Before you can connect to IDEXX Diagnostics, you must have an IDEXX VetConnect PLUS account—you’ll need your account credentials. If you don't have an account, contact IDEXX VetConnect PLUS Customer Support.
- United States IDEXX VetConnect PLUS
- Canada IDEXX VetConnect PLUS
- Australia IDEXX VetConnect PLUS
- New Zealand IDEXX VetConnect PLUS
- Tap Settings > VetConnect PLUS and enter your credentials. For more information see the IDEXX VetLab Station Operator's Guide: Customizing the Settings > IDEXX VetConnect PLUS Settings.
- You must enable the Pending List on the IVLS Home Screen. Tap Settings > Home Screen and then select the Display Pending List check box. For more information see the IDEXX VetLab Station Operator's Guide: Customizing the Settings > Home Screen Settings.
- United States IDEXX VetLab Station Operator's Guide
- Canada IDEXX VetLab Station Operator's Guide
- Australia IDEXX VetLab Station Operator's Guide
- New Zealand IDEXX VetLab Station Operator's Guide
- In Neo, go to Administration > IDEXX Diagnostics.
- Click the menu button in the credentials area and select Manage VetLab Station Serial Numbers.
- Verify each serial number and select each IVLS the practice places orders through. If needed, click Refresh.
- If you are connecting multiple stations, in the Default column, select the default IVLS for the practice.
- Click Save Changes.
- On the menu, click your name. Then, click Diagnostics.
- Click Directory of Services.
- Select the checkbox next to each directory test you use in your practice.
- Select IDEXX VetLab Station to filter the source.
- Use the search box to find a specific diagnostic product.
- Select the Show only new last 30 days checkbox to display tests recently downloaded to the directory from VetConnect PLUS.
- Click Activate to activate the selected tests. Activated diagnostic products are added to the product list and can immediately be ordered from a consultation.
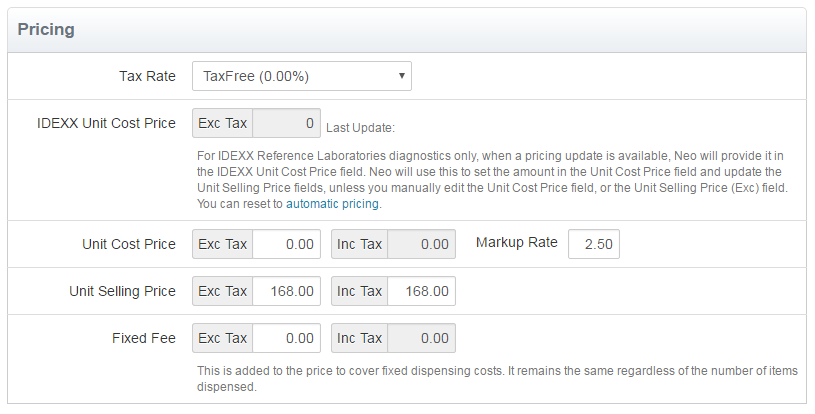
- Click each test's name. No pricing information is downloaded with the directory of services for in-house analyzer tests, so enter a Unit Selling Price now.
6. Click Save Changes.
Note: We recommend that you activate only those tests you use.
- If you have diagnostic tests in your system that you are replacing with IDEXX diagnostic products, you must make your existing products inactive to prevent staff confusion and avoid duplicate product names (for example, having two Chem 10 products to choose from when you search for a Chem 10 on a consultation).
- Remember, you must enter the IDEXX diagnostic directory product on the consultation to order it from Neo.
You're done!
Now that you have activated and priced your IDEXX In-house Analyzer tests:
- The results for diagnostics ordered from the VetLab Station will appear as unmatched results on the Diagnostics page, where you'll need to reconcile them. See reconcile unmatched orders and results for more information.
- The results for diagnostics ordered from a consultation will automatically appear on the task list on the home page, and in the patient’s file. See Order diagnostic products for more information.
For a list of frequently asked questions, see the FAQs: IDEXX In-house Analyzers and VetLab Station article.